Search

FIRE-BASIC-S

Fire Fighting Kits

Options

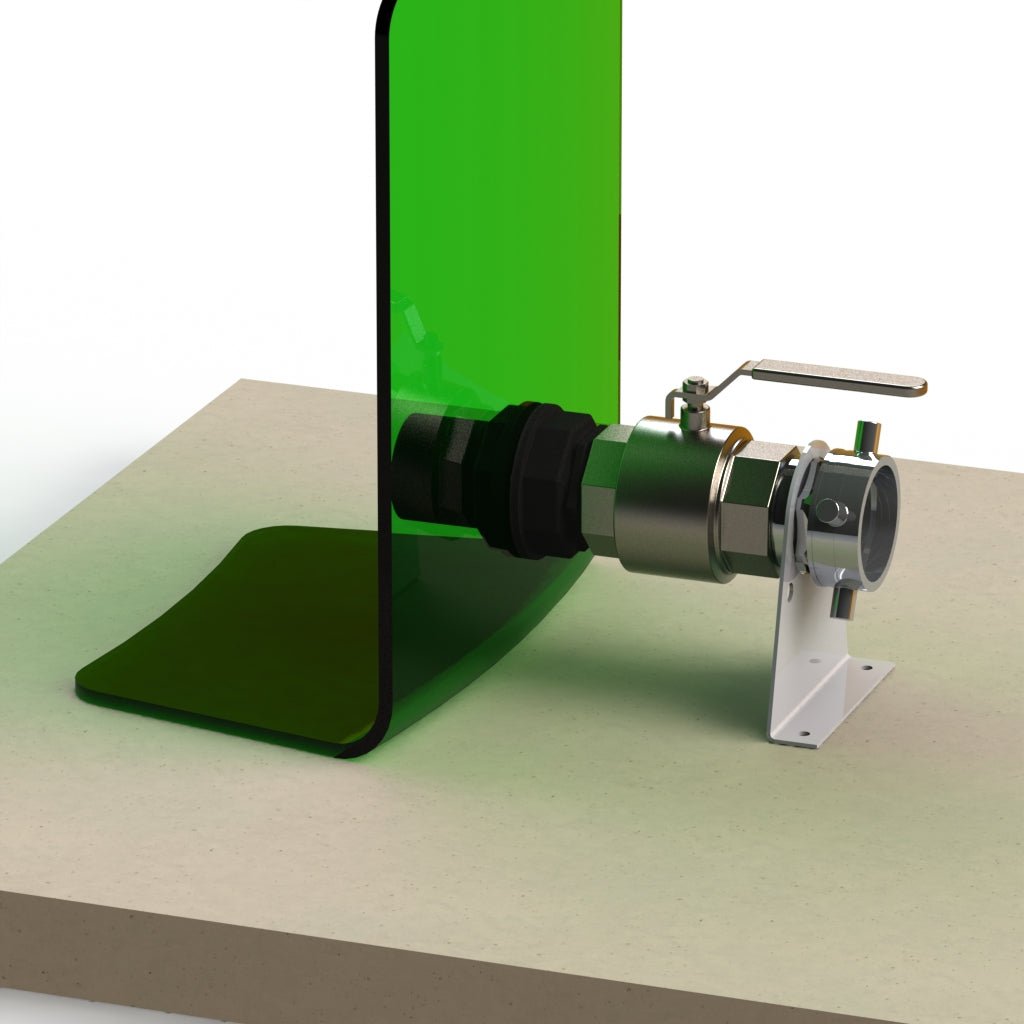
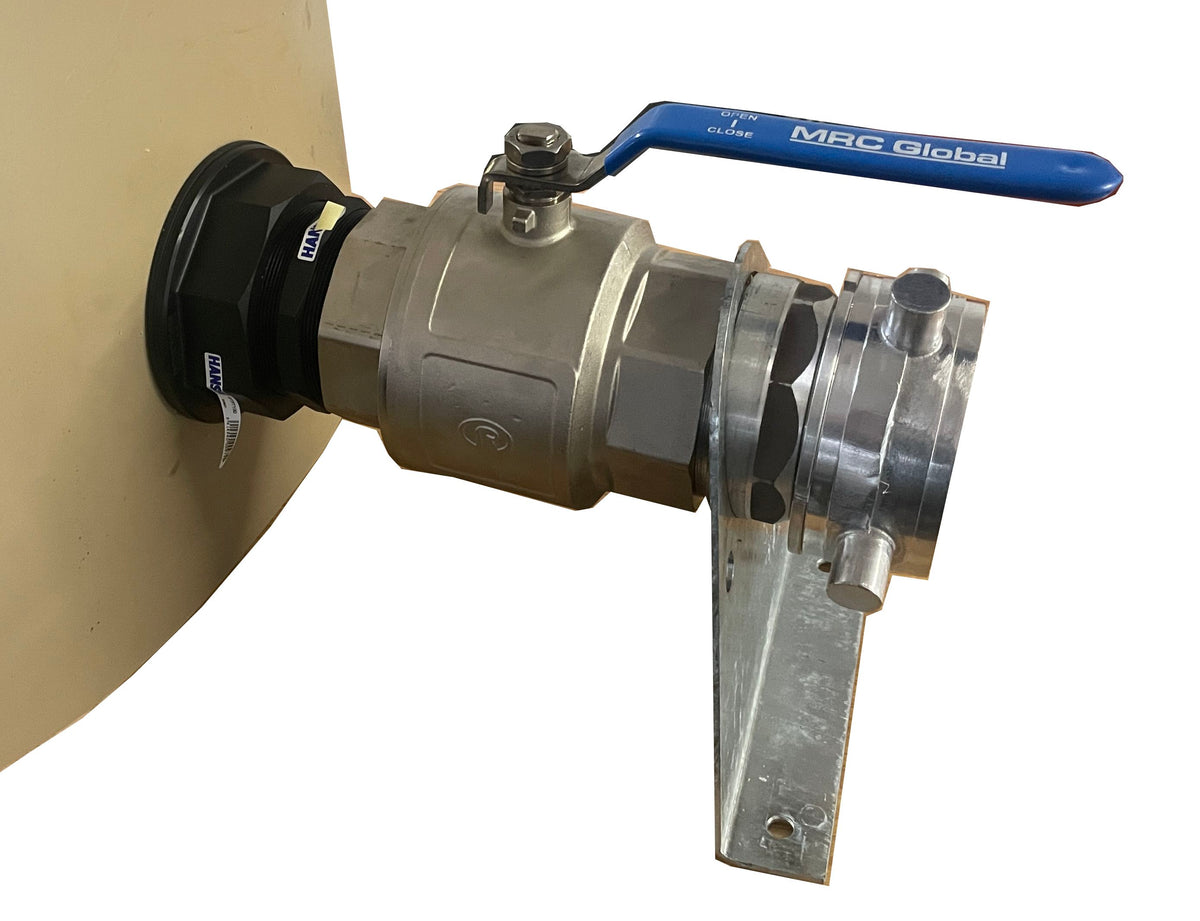
Big Water Tanks Fire Fighting Connection Kit

May be supplied with butterfly valve

Strong Reliable and Industry Approved

We have all the parts required to setup your Fire and Emergency New Zealand Approved Fire Coupling, Including the FRT fire Coupling.


Fire Fighting Kits

In areas where reticulated water supply is unavailable or insufficient there is a requirement for alternative water sources for fire fighting purposes, Big Water Tanks supplies a kit to meet your requirements.

Simple Installation Steps are required to install the tank fitting and it is recommenced you get a registered plumber to install the Fire Fighting Kit.

These adaptors fit the requirement as per the New Zealand Fire Service Fire Fighting Supplies Code of Practice SNZ PAS 4509:2008

Freight on fire Kits only may not be calculated on the website correctly, please contact us should you need these shipped to you, we normally only deliver with tanks.
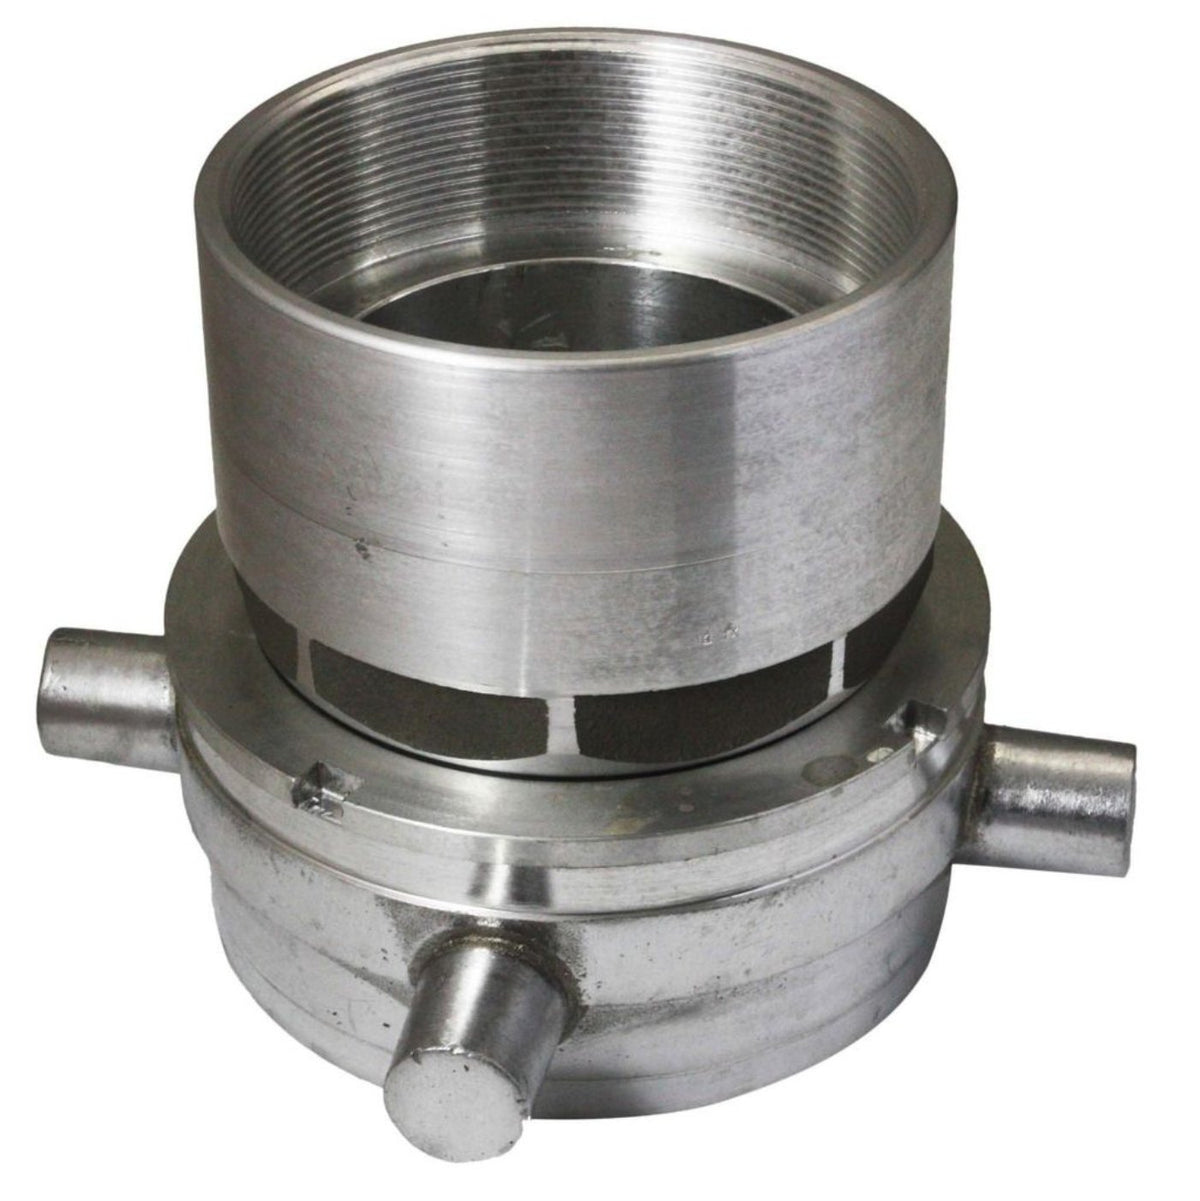
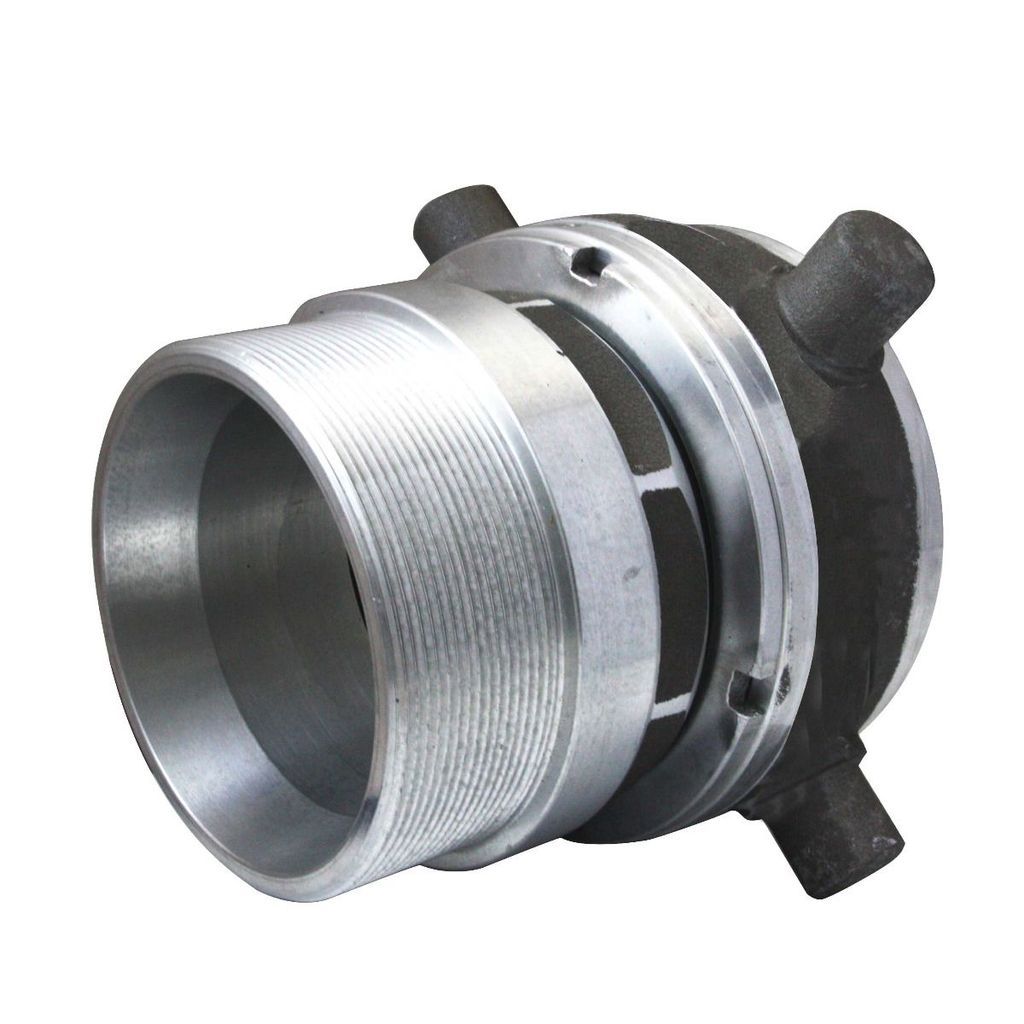
Fire Coupling Kit includes:

  • 100mm BSP Hansen Threaded Tank Fitting
  • 100mm BSP Hansen Nipple
  • 100mm BSP SS Ball Valve
  • 100mm to FRT Coupling
  • Mounting Bracket

Fire Tank Balancing Pipe Kit includes:

  • 2 x 80mm BSP Hansen Threaded Tank Fitting
  • 2 x 80mm BSP Hansen Threaded Hose Tails
  • 2 x 80-100mm SS Wide Band Norma Hose Clamps
  • 1.5m 80mm Flexible pipe

Please note that the 80mm Balancing kit is sufficient flow to balance tanks when drawn from one tank with 100mm Fire Coupling.

Fire Coupling to Tank Installation:

  1. Install the Water tank onto a very well compacted base of GAP7 or Sand, alternatively the tank can be installed onto a concrete pad, ensuring the concrete pad is level.
    Ensure the prepared base is large enough that the tank has at least 200mm all the way around the tank.
  2. Install a Concrete Pad to mount the Fire Coupling, this needs to be at least 400x400 and can be a precast block or poured concrete. The centre of the Block must be approximately 300mm away from the tank.
  3. Using a spirit level mark the level of the concrete pad on the tank, then measure up 200mm on the tank to mark the centre of the fitting cut-out, cut out tank with a 121mm hole saw.
  4. Install Tank Fitting with the female hole on the outside, then install the threaded Nipple, then the Ball Valve, then the Fire Coupling (have the bracket between the ball valve and coupling) with Thread Tape or Thread Sealer.
  5. Fasten the Bracket to the Concrete with appropriate fixings ensuring the bracket is centrally located between the ball valve and coupling allowing for expansion and contraction of the tank.

Alternatively if access is difficult into tank, drop a rope down the manhole and grab it through the hole in the tank, install tank fitting buy dropping the fitting down a rope with the male end of the fitting sicking out the tank, then install the tank fitting nut on the outside and install the ball valve directly to the tank fitting without the nipple. Be careful not to cross thread the threads.

Tanks are not installed with tank fittings from the factory in order to get the correct heigtht of the tank fitting.

80mm Balancing Pipe Installation:

  1. Install tank fittings 150mm up from the base with a 95mm hole saw, install, install pipework with hose tails and Hose Clamps, it is recommended to get a register plumber to install this kit. Allow for a bend in the pipe to allow for expansion.